Here’s a way to design labels that you can then quickly modify for related products.
Photoshop’s Smart Objects, align-and-distribute options, and layer groups make it easy to repeat your label design to fit the label stock.
by Linnea Dayton & Cristen Gillespie, authors of
The Photoshop CS/ CS2 Wow! Book (Peachpit Press). This tutorial is supported by
worldlabel.com.
Step 1.
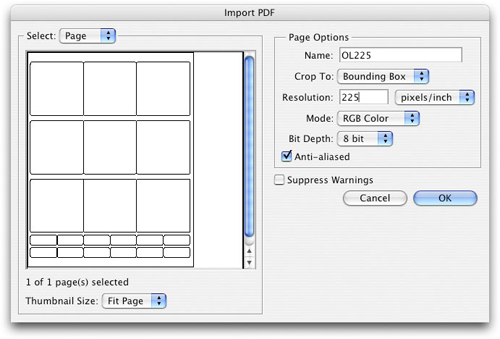
Open a label template to use as a guide for sizing and positioning the label artwork.
(Tip: When we went looking for a label format for the 4.25-inch square face of a box for a boutique candle company, we went browsing at
www.worldlabel.com. They provide free design templates in PDF format which can be opened directly in Photoshop. We picked the standard white WL-OL225WX stock, originally designed for labeling computer diskettes, which could be printed on either a laser printer or an inkjet. We downloaded the PDF lay-out, opened it and set the resolution we wanted for the labels
To see the developing artwork better, add a new layer below the label template (Mac: Command-click the “Create a new layer” button at the bottom of the Layers palette; Ctrl-click it on a PC). Fill the new layer with white; (type D for default colors and then press Command-Delete on a Mac or Ctrl-Backspace on a PC).
Step 2.
Design a label in the top left corner of the template. We are using a file with a cropped, tinted, soft-edged photo. Use the Move tool (V key) to drag-and-drop the photo into the la-bel template file. Then use Free Transform (Cmd/Ctrl-T) to scale the imported photo (by Shift-dragging on a corner) and to position it (by dragging inside the Transform box). Press the Enter key to finish the transform.
Next, open a file that has the logotype for the brand name (In our example: One Candle™, stored as a Shape layer), then drag-and-drop this layer into the file. To integrate the type with the photo, click the “Add a layer style” button at the bottom of the Layers palette, and then choose Drop Shadow. For a soft, even “dark glow” all around the edges, in the Layer Style dialog, lower the Opacity of the shadow to 60% and set the Distance to 0, then click “OK.” In the Layers palette, reduce the Fill Opacity of the layer to let a little of the back-ground color show through.
To add the name of the fragrance to the label design, choose the Type tool (T), click the color swatch in the Options bar and click on the photo to sample a purple. Choose a font, style, and size, and then type “Lavender,” Press the Enter key to finish the type and Com-mand/Ctrl-drag to put the word where you want it.
Step 3.
To make it easy to repeat the label, use a Smart Object. Inside the Layers palette, Com-mand/Ctrl-click the appropriate thumbnails (in this case the type, logotype, and photo), and choose Layer > Smart Objects > Group Into New Smart Object.
Now duplicate your new Smart Object layer (Command/Ctrl-J) as many times as you need to fill one row of your template (we made two copies). Choose the Move tool (V), hold down the Shift key, and drag to the right, using the template as a guide to position the last copy in the top right-hand label frame. In the Layers palette, Command/Ctrl-click on all the other Smart Object layers to target them also and in the Options bar choose a horizontal distribu-tion to complete the row of labels. In this example we used “Distribute left edges,” but any of the three horizontal choices will accomplish the same thing.
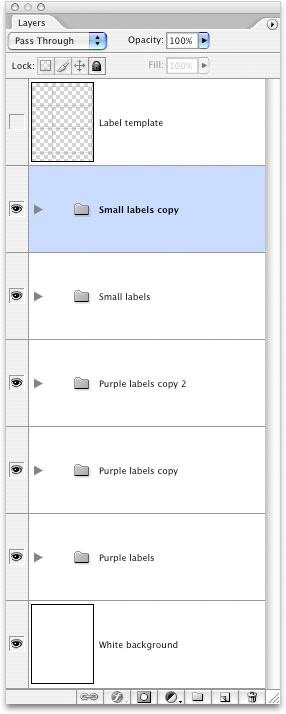
With all the Smart Objects still selected in the Layers palette, Shift-click the “Create a new group button” at the bottom of the palette to group them.
Then, to make the second row of labels, choose Layer > Duplicate Group and then Shift-drag the new group down. Repeat the duplicating and Shift-dragging to make the third row of labels.
(For the small labels at the bottom of the sheet, choose the Type tool and type the fra-grance name and the company’s phone number and url in the top left label space. Then turn this type layer into another Smart Object (Layer > Smart Objects > Group Into New Smart Object) so we can repeat it as we have for the main label. Make five duplicates of the Smart Object this time, distribute them, group them, and duplicate the group to make the second row.)
Step 4.
Now get ready to print the labels. You don’t want the label outlines to print so in the Layers palette, click the eye icon for the label template layer to turn off its visibility. Save the file (Ctrl/Command-S). Then insert the label stock in your printer, choose File > Print, and print as many copies as you want.
Step 5.
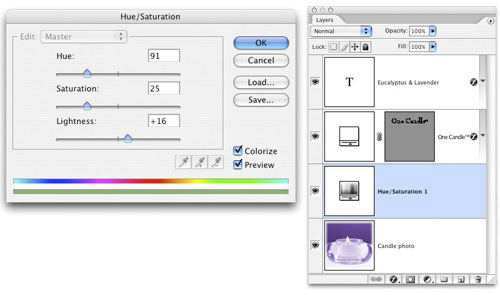
Once your label layout is designed, you can easily revise the entire label sheet by editing one Smart Object layer. In the Layers palette, click the tiny triangle to the left of a group’s folder icon to show the contents of the group — in this case, the group contains Smart Ob-ject layers. Then double-click any Smart Object thumbnail to open the Smart Object (.psb) file itself; our Smart Object’s Layers palette is shown here:
Now make your changes. For instance, in this example we changed the “Lavender” label to “Eucalyptus & Lavender”. To make the changes, target the photo layer in the Layers palette and add a Hue/Saturation adjustment layer above it by clicking the “Create new fill or ad-justment layer” button at the bottom of the Layers palette and choosing from the pop-up menu. In the Hue/Saturation dialog box, turn on the Colorize option, move the Hue slider, decrease the Saturation, and increase the Lightness until you have the green color, then click “OK.”
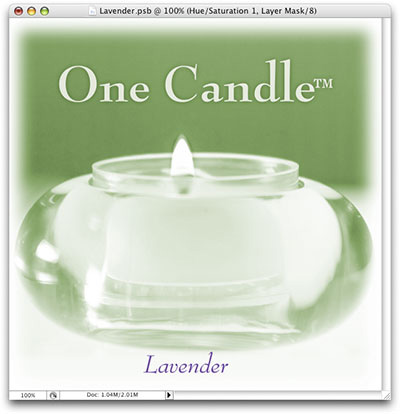
To limit the green to the upper left half of the label, apply a gradient to the mask. Choose the Gradient tool (G) and in the Options bar choose the “Black,White” gradient from the drop-down list. Drag from the top left quadrant of the image to the lower right quadrant; a gradient is formed in the layer mask of the Hue/Saturation layer. With the Hue/Saturation layer still targeted in the Layers palette, paint over the flame with black, which darkens the mask to protect the flame from the color change.
Next, target the type layer in the Layers palette, choose the Type tool, click in the line of type just before the “L” in “Lavender” and type “Eucalyptus & “; then press Enter to com-plete the edit.
Once you’ve made all the changes you want to this label, exercise the magic of Smart Ob-jects. Simply save the altered .psb file (Command/Ctrl-S) to update ALL the labels on the sheet.
(Back in the label sheet file, we also double-clicked one of the Smart Objects for the small labels, and when that .psb file opened, we selected the first line of type and changed the fragrance name, then made changes to size and leading for fit. We saved the Smart Object file to update the main file.)
Save your new label sheet under a different file name (Ctrl/Command-Shift-S) to protect the original label sheet.
Need more labels? Your Smart Object template is ready for the next batch. Label changes that reflect variation in product, season, or even simply your “corporate mood” are now quick and easy!